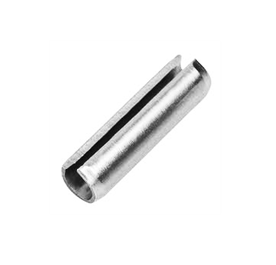
To install a spring tension pin (also known as a roll pin or coiled pin), you must align the host holes precisely and drive the oversized pin in using a dedicated roll pin punch and a hammer. Because spring pins are manufactured slightly larger than the hole, they compress upon entry to create a permanent, vibration-resistant interference fit
Essential Tools
- Roll pin punches: Unlike standard flat punches, these feature a small center pilot ball or nub that keeps the punch centered and prevents the hollow pin from collapsing or flaring.
- Ball-peen hammer or mallet: Used for driving the punch.
- Vise grips or pliers: Highly useful for gripping and stabilizing small pins during the initial start.
- Lubricant (Optional): A drop of light oil can ease insertion into tight metal holes.
Step-by-Step Installation Guide
   Roll Pin Punch (With Pilot Ball)
         [======]
           |||  <-- Pilot ball fits inside the pin
          [===]

          |   | <-- Spring Tension Pin (Oversized)
          |___|
         _______
      ===|     |=== <-- Aligned Host Components

         |_____|
1. Confirm Pin Sizing
Always select a pin matching the nominal size of your drilled hole. For instance, a 5mm spring pin is explicitly intended for a 5mm hole, though its uncompressed resting diameter will measure slightly larger.
2. Align the Components
Thoroughly align the holes of the internal shaft and external housing. If the components are misaligned, the pin will bind, bend, or score the inside of the hole. Use a regular punch or alignment tool to temporarily hold them in position if necessary.
3. Start the Pin
Place the chamfered (tapered) end of the pin into the hole.
- Pro Tip for Small Pins: Small pins are notorious for flipping or dropping. Use a pair of vise grips or locking pliers to lightly pinch the pin near its insertion tip. This lets you hold the pin steady without risking your fingers.
4. Drive the Pin Home
Place your roll pin punch squarely over the exposed end of the pin. Deliver light, controlled, and perfectly straight hammer strikes. Keep driving the pin inward until it sits flush with—or is centered equally within—the host material